On a drive out a few weekends ago, while trying to get past a couple of cyclists on a bend (yeah, my fault), a car came round the corner towards me. I panicked trying to get to the brake pedal and my foot got briefly caught under the pedal, pulling it up. To my horror, the pedal stayed up in the air and I had no brakes! Fortunately, I was going slow and I was able to come to a stop using the handbrake.
When I got the pedal box opened up, I could see that the pedal had been able to travel so far the wrong way, that the rod that goes into the brake cylinder had come right out, hence no brakes.
This weekend , I finally got round to making up a basic pedal stop for the brake pedal so that I wouldn't be able to lift it up the wrong way again. It's not the greatest piece of mechanical engineering, just a piece of ally bent into a sort of U-shape and attached to the top of the brake pedal but it should do the job.
I think I am losing a bit of coolant from the temp sensor in the top of the thermostat but it's only a little and I don't want to try tighten the sensor too much because if I strip the plastic thread in the thermostat, it's going to be a pain to replace. Just means I have to top up the coolant every month or so - not too much of a hardship.
The brake judder I mentioned last time isn't the brakes - I think it's just the steering column shaking. All the bolts seem tight - I think it's just the fact it's a long length of metal which is only supported at each end which is why it vibrates under heavy braking. But I'll check with the experts on the forum...
Update: Went to a tyre place and got the wheels re-balanced - they were MILES out!! Vibration now hugely improved although not gone totally. I've ordered a dial gauge to check the discs as well.
Showing posts with label Steering. Show all posts
Showing posts with label Steering. Show all posts
Sunday, 17 February 2019
Saturday, 24 November 2018
The nut at the wheel
Recently, i have noticed a little way-wardness with the steering which i thought was just the wet and icy roads in this weather. But then, on my way home from work, I realised that I had a good 2 inches of play in the steering. I took the wheel off today and realised the main bolt holding the wheel into the column was loose. Thankfully a simple fix (adding some thread lock this time) and hopefully a return to go-kart level of directness.
Having decided that I wouldn't commute in Zedster too often, I've done just that for the last week. A combination of my old bones getting too cold on my motorbike and a very squared-off front tyre on said bike making the early morning ride a bit hairy, means Zedster has been the transport of choice.
One new problem at this time of year is being blinded by cars in my rear view mirror, so I've bought some anti-glare film for the mirror - fitted tonight, see how it goes.
Finally, I've continued to have wiring problems with the right, front DRL and indicator - I think the the wire was simply too short and vibrations were separating the spade terminals. So, I've added several inches of extra wiring to remove the tension - hopefully it will finally be fixed.
Sunday, 11 June 2017
Round the bend... and back
Success! I have some self-centering and when I say 'some', I mean like a vague suggestion of self-centering if you squint sideways... but I believe that is normal and acceptable for IVA.
I'm not sure what fixed it but I did the following:
1. Lowered the front - it should be 10mm lower than the rear but mine was the same.
2. Reduced tyre pressures by 2 psi.
3. Switched the indicator cam round that sits between wheel and column. I don't have column stalks so I don't need the cam but Simon suggested I should leave it in. When I took the wheel off, I realised the cam was squashed in and didn't turn, suggesting either it was in the wrong way or the wheel was tightened up too much (very likely for me). So swapped it round - I may go back and loosen the bolt as well as that simply holds the steering wheel to the column and I don't think it needs to be as tight as I have it.
Much happier now...
Thursday, 8 June 2017
Mr Cockup returns for a late encore
The chap from Emerald connected up to my PC (amazingly, this all worked first time) but he noticed an immediate problem with my TPS signal - it was showing a value of 420 at zero throttle when it should have been around the 200 mark. Also, it initially DROPPED to 410 as I pressed the accelerator before rising up to about 600 - it should go up smoothly to a maximum of around 900.
I had a panic attack about having to spend £70 on a new TPS and wait days for it to be delivered. After much panic Googling and posts on forums, another bloke at Emerald suggested it was more likely to be the wiring to the TPS plug (Simon also said this).
At first, I just couldn't understand that; the engine started, ran and idled pretty well - surely if the TPS wiring was wrong, there would be more obvious symptoms?
There are only 3 wires into the TPS plug; ground, positive 5V from the ECU and the signal back to the ECU. Could I be that stupid to get them wrong? Well, a few tests with a multimeter gave me the answer. I can't remember where I got the TPS pin layout from but it was obviously wrong. Half an hour to redo the wires and now, 180 to 850 showing in the Emerald software - what a relief! I don't need this sort of panic so close to IVA.
I was at least able to confirm that my map switch works - got it flicking between a power map and another map that will be the emissions when I upload that (Simon has sent it to me). I've got some instructions from Simon and Emerald to help fiddle with the map when I have the car connected up to a gas analyser (booked in for Saturday before IVA - first weekend day I could get).
Went for a drive up the road - still no self-centering of the steering and getting a little concerned about that now. I'm going to check the front ride height (maybe it could be lowered although not sure if that will help) and might drop the tyre pressures a little (20 psi at the moment, 18 psi is a common setting but I don't know how much difference that will make). Last resort is to try adjust the front tie rods for some more toe-in and maybe loosen the steering rack even more?
11 days to IVA...
Saturday, 13 May 2017
Soft and squidgy
Spent an hour putting IVA trim on the bits that need it; front hubs, bottom of the rear panel and steering wheel:

Looks pretty horrible and I hope it's enough.
UPDATE: Yup, it was.
Put numerous nut covers on but, annoyingly considering I bought the covers off GBS and you'd think they know how many I'd need, I've not got enough! More on order...
Good news is that I've got my laptop talking to my ECU and I took the excuse to go for another little drive. Bad news is that I still don't have any self-centering going forward but I do have it in reverse - I wonder if I can persuade the IVA guy to do it that way :-). Not sure whether I should be loosening the rack even more - I loosened it by about 2 turns of the nut which felt like a lot.
IVA plate to be welded on Wednesday and I'll try arrange a remote session with Emerald sometime next week.
Seat runners here BUT the bolts I've got are too long. I ordered more, along with nuts and washers, so seats won't be done this weekend.
Saturday, 6 May 2017
The Great Unveiling
Today was a biggie - my seats arrived and look great, although tiny. Unfortunately, they're so small that the universal runners I've got are too wide for them, so a new set are on order.
I needed to get a photo of the car 'finished' for the IVA application which was a great excuse to get it out the garage, seats in (vaguely) and the last of the panel covering removed - ta dah!


Sorry, should have got a clearer shot of the seats - I'll do that for next time.
While the car was out, I wanted to go for a real drive, just up the road but enough to check out if she actually vaguely works. First, I wanted to try play with the ECU but I couldn't get my PC to connect up. After some mucking about, it briefly connected but went again, which suggests the cheap USB adaptor I bought has gone AOL. I've been to Maplins and bought a decent one and I'll try again tomorrow.
As I haven't actually started the car since November, I was a bit apprehensive but no worries, started first time. The idle isn't very smooth (which is why I wanted to play with the mapping) but not too bad.
So, bright sunny day, a rumbling engine in a sexy little body (the car, not me) - it would be rude not to. So off I rumbled up the road... 200m and back. She runs horribly; map desperately needs sorting out and I have no self-centering of the steering which is an IVA fail, so needs fixing.
The brakes are rubbish but I'm not sure if that's just me not being used to non-servo brakes, the pads needing bedding in or bleeding - most likely all three.
Positives? The speedo works, which I'm very happy about because it could be annoying to fix.
But the best bit was the drive; the noise, the wind (even at 25mph), the mechanical clunk's and whines - awesome! My wife became my first passenger and even she loved it (she's shown little interest up to now).
So, list of jobs:
1. Steering self-centering.
2. Brake bleeding.
3. Fit seats.
4. Engine map improvement.
In other news, my IVA is being engraved on a steel tab at a local shoe repair shop and a nice chap from the RHOCAR forum has kindly offered to weld it for me.
I've made an utter dogs dinner of the gearstick gaiter, getting glue everywhere but it will do for now.
And finally, the story of the day:

I needed to get a photo of the car 'finished' for the IVA application which was a great excuse to get it out the garage, seats in (vaguely) and the last of the panel covering removed - ta dah!


While the car was out, I wanted to go for a real drive, just up the road but enough to check out if she actually vaguely works. First, I wanted to try play with the ECU but I couldn't get my PC to connect up. After some mucking about, it briefly connected but went again, which suggests the cheap USB adaptor I bought has gone AOL. I've been to Maplins and bought a decent one and I'll try again tomorrow.
As I haven't actually started the car since November, I was a bit apprehensive but no worries, started first time. The idle isn't very smooth (which is why I wanted to play with the mapping) but not too bad.
So, bright sunny day, a rumbling engine in a sexy little body (the car, not me) - it would be rude not to. So off I rumbled up the road... 200m and back. She runs horribly; map desperately needs sorting out and I have no self-centering of the steering which is an IVA fail, so needs fixing.
The brakes are rubbish but I'm not sure if that's just me not being used to non-servo brakes, the pads needing bedding in or bleeding - most likely all three.
Positives? The speedo works, which I'm very happy about because it could be annoying to fix.
But the best bit was the drive; the noise, the wind (even at 25mph), the mechanical clunk's and whines - awesome! My wife became my first passenger and even she loved it (she's shown little interest up to now).
So, list of jobs:
1. Steering self-centering.
2. Brake bleeding.
3. Fit seats.
4. Engine map improvement.
In other news, my IVA is being engraved on a steel tab at a local shoe repair shop and a nice chap from the RHOCAR forum has kindly offered to weld it for me.
I've made an utter dogs dinner of the gearstick gaiter, getting glue everywhere but it will do for now.
And finally, the story of the day:

Sunday, 29 January 2017
Shrouded in mystery
Well, my column shroud is turning into a (relative) masterpiece. Obviously, for anyone with a modicum of skill, it's a pile of junk but for a rank amateur like myself, it's awesome! The U-shaped bracket is brilliant - very sturdy and supports the whole structure nicely. I've improved it a lot since yesterday by re-bending the metal lower piece so that it fits inside the plastic top part:

Looks OK in place and will be much better once vinyl covered:

Added the mesh pieces to the other front wheel arch:


Saturday, 29 October 2016
Finally, a car shape
Lucky you - 2 posts in one day...
I hadn't planned to even go into the garage today but I somehow managed to squeeze in what I thought would be a quick session to start on the nose cone
Several other blogs seem to have had issues with their nose cone so I was a little concerned but it turned out to be much easier than I expected. First was some rivnuts in the top chassis brackets:

The nose needed a little bit of the flange trimmed off to allow it to fit over the outside of those brackets. Then 2 holes underneath in the lower chassis rail with rivnuts, a little jiggery-pokery with the holes in the nose cone and voila:


As I still seemed to have some (stolen) time left, I thought I'd try fit the scuttle. Again, this was something that seemed a bit daunting but unless I've done something wrong, it was very simple. Maybe this was because I already had the correct shape formed but all I had to do was bolt it in place and tighten the bolts gradually. It tightened down perfectly:

Finally, something I've wanted to do for ages - fit the steering wheel. A few simple bolts and done - placed the dash roughly in place for the full effect:

So I finally have something that looks far more car-shaped which should please my son who keeps complaining that it doesn't look like anything!

I hadn't planned to even go into the garage today but I somehow managed to squeeze in what I thought would be a quick session to start on the nose cone
Several other blogs seem to have had issues with their nose cone so I was a little concerned but it turned out to be much easier than I expected. First was some rivnuts in the top chassis brackets:

The nose needed a little bit of the flange trimmed off to allow it to fit over the outside of those brackets. Then 2 holes underneath in the lower chassis rail with rivnuts, a little jiggery-pokery with the holes in the nose cone and voila:


As I still seemed to have some (stolen) time left, I thought I'd try fit the scuttle. Again, this was something that seemed a bit daunting but unless I've done something wrong, it was very simple. Maybe this was because I already had the correct shape formed but all I had to do was bolt it in place and tighten the bolts gradually. It tightened down perfectly:

Finally, something I've wanted to do for ages - fit the steering wheel. A few simple bolts and done - placed the dash roughly in place for the full effect:


Wednesday, 5 October 2016
Spic and span
I ordered thread lock from someone on eBay where the advert said 'UK stock' and 3 days delivery - checked it today and it says at least another 10 days for delivery! Turns out it's coming from China...I've reported him to eBay and ordered more from elsewhere...

 I've put a thin layer of foam and some rubber mat between the firewall and ECU for some heat and vibration protection (no idea if that is needed but can't do any harm).
Fitted the steering column shaft and tidied up the engine loom, alternator wire and HP fuel line by cable-tieing (is that a word?) them to the brake line. I'll check with GBS that it is OK to have those 3 tied together. I also need to check if I'll need to trim down the bolt on the steering shaft:

Forgot to mention last time that I moved the car about 6 inches to one side, so I could get to the offside more easily. Scary job - car balanced on the jack at the rear and I found the car is now too heavy for me to lift at the front, not even the few mm needed to allow the move. I had to make use of my car jack to lift the front and then pull it sideways.
With no thread lock, I couldn't tighten up the rear calipers and test the brakes, so I decided to concentrate on tidying up bits and pieces in preparation for rolling the car out the garage.
First off, I decided to move the ECU from the special bracket I made a few months ago to be on the firewall. I've decided I'm not going to install a heater in the future so I don't need to leave space on the firewall for it.


Fitted the steering column shaft and tidied up the engine loom, alternator wire and HP fuel line by cable-tieing (is that a word?) them to the brake line. I'll check with GBS that it is OK to have those 3 tied together. I also need to check if I'll need to trim down the bolt on the steering shaft:

It's not close to anything but just looks a tad long.
Tuesday, 26 April 2016
Turned the key and...
... yup, the steering lock does work. Sorry, didn't mean to get you all excited :-). Yes, the reason I couldn't turn the boss was that the steering lock (a little metal block) was stopping it. It never occurred to me that's what it was... good to know it works.
The accelerator pedal turned out to be very fiddly.
First, I had to enlarge the hole in the top to M5 size for a clevis pin but, crikey, that metal was a nightmare to drill through. I had to do it in 0.5mm stages as my cobalt drill bits just couldn't seem to get through it in one go.
GBS had sent me a diagram of how to best fit the accelerator pedal which required trimming the side pieces where the bolt goes through. Unfortunately, I took too much off - luckily, I was able to retrieve the bit I hacked off from the bin and just fitted it on the bolt as if it had never come off. Genius, me. In fact, it was very helpful as it allowed me to put an extra penny washer on that side, to keep the pedal away from the side of the pedal box.
Anyway, took a couple of hours but I think I've finally sorted it:


The clevis pin hasn't arrived yet and that isn't the final nut on the bolt, in case you notice.
Sunday, 24 April 2016
Dashing ahead
Sneaked another hour or so in the garage and continued with the dash. Before I decide where the gauges go, I need to clarify where the steering wheel goes and cutout the dash for the steering column to fit.
Loosely fitted the firewall, scuttle and dash and marked up where the steering column comes through. Not sure of the best way of cutting fibreglass but reading online, it seems to be a mix of saw and sanding drum on a Dremel as the easiest combination, so that's how I started:

Another technique is to drill lots of small holes close together and then saw through them, which worked well. But the sand drum in my drill was the best - on a slow speed, it is very precise and quick, although messy. After a few sand-fit-sand repetitions, I had a pretty decent result:


It doesn't even have to look great as it will be covered by a shroud eventually.
That steering boss is only loosely on as I can't quite work out how it fits (posted question on GBS forum).
Months ago, I ordered a special shroud that GBS offer as I didn't have an old Sierra one. However, as I'm not using column stalks any more, that shroud is no good to me (and anyway, I can't see how it would fit with that boss which I also got from GBS). So, I'm going to make my own - shouldn't be too tricky, I hope.
Friday, 11 March 2016
Trial of Hercules
Probably the most frustrating evening yet in my garage, just trying to fit the front suspension.
Having said the side panel was a good fit, I may have put it 10mm too far forward as I had to file that much out of the panel to get the top right wishbone end in.
I had previously loosely put the front suspension together but it was proving too difficult to try fitting washers with the weight of the hub like that, so I had to virtually dismantle it.
Once in pieces, getting the washers between bushes and chassis was a nightmare; less access with the panels and other parts in and the mounting points are much more restricted anyway.
Two hours of mostly swearing and it's on but not even torqued up - and I've still got the other side to do. Joy!
Saturday, 23 January 2016
My weight in Emeralds
Not had time all week to get into the garage, what with cleaning up after the puppy! It's like having a baby wandering around without a nappy on...
Anyway, had a delivery of the most expensive single item (pound for pound) of the whole build - the Emerald ECU. A box half the size of my laptop with no screen, keyboard or hard drive but costs almost 3 times as much! It should be made of emerald for that price...
Didn't even do much tonight - finally shortened and fitted the gearbox mount bolt, adjusted the quickshift to make the lever sit vertically when in neutral, tightened up the steering rack and spent ages staring at where the loom has to go.
To save money, I'm going to make up part of the engine loom myself. I've bought a flying loom from Emerald which has the main plug pre-wired with the basic wires (injectors, ignition, temp sensor etc) and a load of extra wires if you want to add other stuff. With a printout of the GBS loom pins and ECU pins, I've mapped the 2 so I have an idea what connects to what.
I had also ordered an engine plug from GBS which was supposed to be the male of the 'engine link' plug on the main loom but it arrived with a female plug! Called GBS and it seems the whole consignment they ordered from another supplier is like that. They apologised profusely and will send me out a correct one when it's done. I spent ages trying to find just the plug itself (the GBS one also comes pre-wired) but they don't seem to exist in this country. I could have got it from the US but would cost a small fortune. Wish I knew where GBS got theirs from...
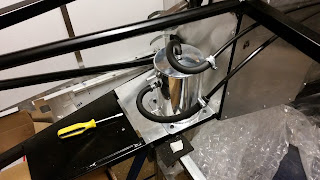
The radiator, fan and brackets are also now here so I can start thinking about the cooling system as well. Again, to save cash, I'm not using the water rail kit - I'll just use the standard Ford thermostat so I need to buy some piping, silicon tubes and a header tank and then decide which one of the 5 different layouts I've found online to use!
Anyway, had a delivery of the most expensive single item (pound for pound) of the whole build - the Emerald ECU. A box half the size of my laptop with no screen, keyboard or hard drive but costs almost 3 times as much! It should be made of emerald for that price...
Didn't even do much tonight - finally shortened and fitted the gearbox mount bolt, adjusted the quickshift to make the lever sit vertically when in neutral, tightened up the steering rack and spent ages staring at where the loom has to go.
To save money, I'm going to make up part of the engine loom myself. I've bought a flying loom from Emerald which has the main plug pre-wired with the basic wires (injectors, ignition, temp sensor etc) and a load of extra wires if you want to add other stuff. With a printout of the GBS loom pins and ECU pins, I've mapped the 2 so I have an idea what connects to what.
I had also ordered an engine plug from GBS which was supposed to be the male of the 'engine link' plug on the main loom but it arrived with a female plug! Called GBS and it seems the whole consignment they ordered from another supplier is like that. They apologised profusely and will send me out a correct one when it's done. I spent ages trying to find just the plug itself (the GBS one also comes pre-wired) but they don't seem to exist in this country. I could have got it from the US but would cost a small fortune. Wish I knew where GBS got theirs from...
The radiator, fan and brackets are also now here so I can start thinking about the cooling system as well. Again, to save cash, I'm not using the water rail kit - I'll just use the standard Ford thermostat so I need to buy some piping, silicon tubes and a header tank and then decide which one of the 5 different layouts I've found online to use!
Tuesday, 20 October 2015
Gunk overload
No big step forward but lots of consolidation.
I'd put the large driver side tunnel panel on and that's the last panel for the foreseeable future. As there was still a third of the gunk left in the tube and it would probably be rock solid before I needed it again, I decided to go nuts and fill as many gaps as I could as well as going over some of the existing runs. Bit messy in places but it's not visible so not a problem.
Cable-tied the LP fuel lines to the brake pipe:

I realised i hadn't tightened the pedals, went to do this and found the central tube wasn't sticking out of the bush enough to press against the washer, so the pedals were rock-solid. I had to take the clutch pedal off and file the bush down to finally allow the pedals to be tightened up but still rotate freely.
Connected the swirl pot up to the LP fuel pipes:
Fitted some rivnuts and added brackets on ready for the HP fuel pump

... and then, disaster - the bottom inlet pipe on the fuel pump is far too big for the 7.6mm fuel pipes I've got. Either I need some sort of adaptor or I've got the wrong pump. Bugger!
I wanted to tighten up the steering rack but the clearance on the off-side between the rubber gaiter and the wishbone bracket was non-existent - literally touching. So, with my months of engineering experience, I made a spacer out of some metal bar I had lying about. Fitted this under the existing bracket and voila - a whole 5mm of clearance. My feeling of pride over this tiny bit of Heath Robinson jiggery-pokery is out of all proportion to the difficulty involved - love it.
I'd put the large driver side tunnel panel on and that's the last panel for the foreseeable future. As there was still a third of the gunk left in the tube and it would probably be rock solid before I needed it again, I decided to go nuts and fill as many gaps as I could as well as going over some of the existing runs. Bit messy in places but it's not visible so not a problem.
Cable-tied the LP fuel lines to the brake pipe:

I realised i hadn't tightened the pedals, went to do this and found the central tube wasn't sticking out of the bush enough to press against the washer, so the pedals were rock-solid. I had to take the clutch pedal off and file the bush down to finally allow the pedals to be tightened up but still rotate freely.
Connected the swirl pot up to the LP fuel pipes:

Fitted some rivnuts and added brackets on ready for the HP fuel pump

... and then, disaster - the bottom inlet pipe on the fuel pump is far too big for the 7.6mm fuel pipes I've got. Either I need some sort of adaptor or I've got the wrong pump. Bugger!
I wanted to tighten up the steering rack but the clearance on the off-side between the rubber gaiter and the wishbone bracket was non-existent - literally touching. So, with my months of engineering experience, I made a spacer out of some metal bar I had lying about. Fitted this under the existing bracket and voila - a whole 5mm of clearance. My feeling of pride over this tiny bit of Heath Robinson jiggery-pokery is out of all proportion to the difficulty involved - love it.
Thursday, 10 September 2015
Crawling on
Starting to get really annoyed with this hub nut socket. I thought I'd measured it to be 40mm and so ordered that size socket. Arrived today - too damn small! Aaarrrgggghhhhh! Now have to go through the hassle of trying to return it and exchange for a 42mm socket. Yet more delay...
Steering ball joints arrived (hurrah) but can't fit them because I need a M18 tap to get the powder coat out of the wishbone thread (boo) - more delay.
Loosely fitted the steering rack to get a feel for it:


The steering column was a bit close to the brake pedal, so moved the spacers round so there is a whole 3mm between the pedal and column - hope that's enough. As always, I'm missing bits - this time tie rod extensions. Never heard of them before but pretty essential. Ordered from GBS, along with some IVA covers for these parts.
Moved the 4-way brake splitter up 5mm or so - much better:

Yet another extra hole in my chassis 😊
The front calipers are finally done - not quite as good as the rears but OK from a distance:

I'm actually starting to run out of parts, although frustratingly, most of the parts on the car are not finalised; just loosely attached awaiting other bits. Actually quite impressive for me, I'm normally very impulsive and would just throw everything on. I'm consciously trying to think ahead but not sure if I'm overdoing it at the moment.
Friday, 28 August 2015
Lines of thought
I was getting a bit panicky about how many jobs there were that I'd started but couldn't finish - handbrake, pedals, master cylinder etc.


But after some thought, this is the plan of attack:
1. Fit driveshafts (now painted but need new boots fitting).
2. Fit rear hubs.
3. Rear brake discs and calipers.
4. Fit handbrake cable to caliper.
4. Brake lines from 4-way unit above diff to calipers (copper to braided).
5. Brake line from master cylinder to 4-way unit.
Started by fitting a rivnut for the 4-way unit:

More difficult than it sounds - the hole is too big really and I destroyed 4 rivnuts before cunning use of a soldering iron got the job done.

As I plan to start on brake line routing, I thought I'd better check where the steering column goes:

Raised a few concerns about proximity of brake pedal to column and if I've done the 'grommet from Hell' properly.
Monday, 20 July 2015
Staring at things
A couple of hours of...er...doing very little. I was planning of continuing with drilling the rear panel but then realised that I've been using a 3mm drill bit when the rivets are 3.2mm. I assumed that I'd never manage to drill an EXACT 3mm hole but it seems I'm better than I thought and the rivets don't fit. Problem is, I've only got a metric drill set so my next bit size is 3.5mm. I drilled one hole that size and the rivet is just a little loose so it looks like I need to buy some 3.3mm bits.
I then spent 30 minutes finding and then staring stupidly at the pedals. GBS provide a list of items needed for the pedals but absolutely no clue how they go together. Many thanks to Richard for having an excellent picture on his blog of the pedal setup. Sadly, none of the bushes for the pedals fit - I need to remove the powder coating from the inner surface of the pedal joint (?), I think.
The only thing I actually did tonight was to remove the old ignition barrell from the steering column - 30 minutes with a hacksaw, screwdriver and pliers:

Need to order some bits and pieces - tap and die set in particular to get powder coating out of threads.
Sunday, 19 July 2015
First stumbling steps
Well, i promised the wife that i wouldn't spend my life in the garage, so only managed a few hours today but strangely productive...
Finished the discs off and whacked a quick coat of Hammerite on part of the old steering column:

Using some bits of wood and a G-clamp, i managed to get the 'nightmare' steering column grommet done in 15 minutes - hope I've done it right:

And (drum roll please)....drilled my first hole:

....followed by 10 or so others in the rear panel (using clecos for the first time). A couple have ended up a bit too close to the edge of the tube but i don't think it will be a problem? I've asked for advice on the GBS forum about it...
I'm planning on drilling as many holes as possible but not riveting anything until as late as possible - the later i leave it, the more access i have for routing brake pipes etc.
An unforseen positive is the interest my previously X-Box-addicted son is showing - got him doing the dull job of removing panel protection stuff:

Subscribe to:
Posts (Atom)