Saturday 26 March 2016

Pipemania

A little more progress on the cooling system:


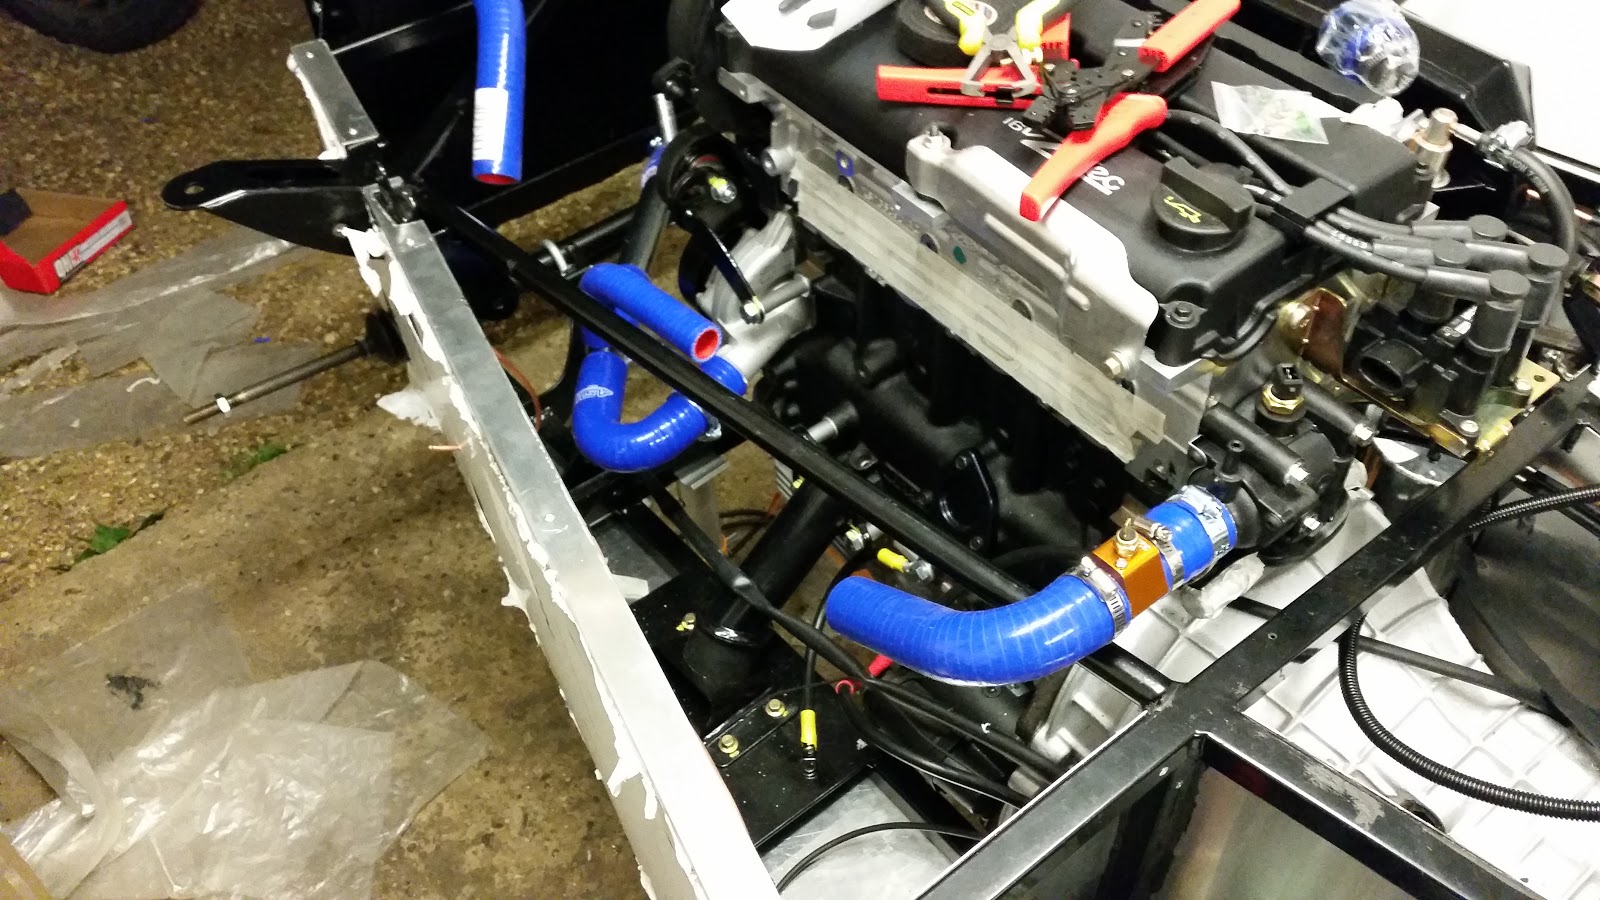
As is often the case,  I've been halted by a lack of parts - I need a few more pipe bits which are on order. I'm going to end up with quite a mass of pipes under the exhaust manifold and a heck of a lot of jubilee clips to get all the angles. It's actually quite fun trying to route it all but it's not going to look as simple as the GBS water rail - I can live with that.

I forgot to say that I've fitted the radiator and fan (6 months ago,  that would have been a momentous task for me,  now I almost forgot to mention it). Previous blogs seemed to talk about having to bend brackets but maybe GBS have changed the chassis because it was pretty straightforward for me:


I also fitted the dipstick,  in case it affected the route of the piping (it doesn't).

As I've got the thermostat and the other temp sensor in place,   I started finalising that end of the engine loom. Got stuck with working out which pins are which on the coil pack (and the TPS) - put a post up on the GBS forum to ask.

While I'm summing up,  did I mention that the dashboard had a small crack in it when it arrived in the post? Thankfully,  GBS will replace it so this one goes back in the post next week.

On holiday next week,  so no more updates until then...

Wednesday 23 March 2016

Blue worms

Finally,  I got to use those pretty blue silicon pipes I ordered weeks ago.

First off,  loosely attach the thermostat to the engine and the special adaptor piece for the second temp sensor to fit into (this one is for the dash gauge and so location isn't as critical as the other one,  which is for the ECU). Apologies for the colour of this adaptor - the picture on the website was in blue but the colours were size dependent and,  obviously,  I didn't notice that:


Several weeks ago,  I drew up a plan for how the cooling system pipes fit - hopefully,  this is correct:


Obviously,  not finished - I need:

1. Main 32mm pipe to go in from thermostat to top radiator pipe (I may need to buy another bit of silicon for that).
2. 22mm pipe from lower thermostat pipe to the T-junction before the water pump (cold bypass?).
3. 22mm pipe from bottom of header tank to T-junction near bottom radiator pipe.
4. Small (8mm?) pipe from top of thermostat to top of header tank.

I would post a scanned image of my cooling system design but it's not pretty and unlikely to be helpful to anyone else.

Monday 21 March 2016

Just like the Pointer Sisters...

... I'm so excited!
And I just can't hide.... OK,  enough of that,  sorry...

The 'last chance saloon' tap arrived to try get the coolant sensor adaptor in the Ford thermostat and it only went and worked!

This is a thread:


And this is the often-mentioned sensor in place:


Hopefully,  I can crack on with the coolant system now and if this all works,  it will have saved me £200 or so.

Sunday 20 March 2016

Sparky rides again

To go along with my craftsman badge,  I'm now an electrical genius,  as my home-made engine loom goes in. OK,  it might not actually work but that's just detail...

The Y-shaped junction is the ECU/fusebox end of the item in question - this is roughly where it will go in the car:


Difficult to really show anything but the long, thin, black case holds the injector plugs:


... and underneath are the plugs for alternator,  air temp sensor and oil pressure sensors. I haven't put the TPS plug on yet but that won't take long. I've not tidied up the routing of the loom as I'm not sure of the best way to do that - it can wait until later.

I've spent some time trimming bits off the firewall and pedal box to ensure,  hopefully,  that it fits well with the scuttle,  including drilling some holes in the side of the pedal box for the brake fluid pipes to run to the master cylinder:


I'm making my last attempt to using the Ford thermostat - I've ordered a 3/8 BSP tap which is what Emerald says their adaptor size is.

Monday 14 March 2016

Hercules done ok

Off-side suspension mostly on and tightened up,  with IVA covers on:


Finally unboxed the front discs and started putting some black Hammerite on the boss and edges,  as I did for the rear (I hate the rusty look that discs get) :


Looking less and less likely that I'll be able to use the original Ford thermostat. I spoke to Emerald today to try work out what size the adaptor is for the temp sensor - they weren't sure but did say it wasn't metric which rather ruins my theory and is a waste of about £20 of M16 taps I've been buying!

The guy suggested I make my own adaptor and when I said how,  he asked if I had a lathe! When I laughed,  he asked if I had a friend who had one which made me laugh even harder.  Says so much about his world and mine :-) Most of my friends don't even have a screwdriver!

Friday 11 March 2016

Trial of Hercules

Probably the most frustrating evening yet in my garage,  just trying to fit the front suspension.

Having said the side panel was a good fit,  I may have put it 10mm too far forward as I had to file that much out of the panel to get the top right wishbone end in.

I had previously loosely put the front suspension together but it was proving too difficult to try fitting washers with the weight of the hub like that,  so I had to virtually dismantle it.

Once in pieces,  getting the washers between bushes and chassis was a nightmare; less access with the panels and other parts in and the mounting points are much more restricted anyway.

Two hours of mostly swearing and it's on but not even torqued up - and I've still got the other side to do. Joy!

Monday 7 March 2016

Can you guess what it is yet?

The next steps are the scuttle and firewall but it's proving tricky as there are so many bits that are dependent on these parts.

Because I couldn't find a Sierra brake fluid reservoir that would sit on the master brake cylinder,  I've had to get the GBS remote reservoir which has to bolt to the firewall.

If I don't use the GBS water rail,  I also need the coolant header tank on the firewall, then the main fuse board on the other side,  allowing space for the wiper motor and the ECU. Oh yeah,  and I'd ideally like to leave space for a heater.

So it's going to be busy...

I've nicked an idea from Richard L -  it starts like this:


... shape cut out:


... bit of folding :


... hole cut out (badly) :


... and (drum roll)  we have:


... an ECU holder - good,  huh? A bit of panel beating later and the edge is shaped round the chassis tube:


I'll bond that end eventually. An enjoyable couple of hours making 'stuff'...

Update: sadly,  this cool piece of work is not being used as I decided not to fit a heater so I didn't need to leave space on the firewall and thus the ECU could go there instead

Maybe an art gallery wants it? Or not....