Showing posts with label Handbrake. Show all posts

Sunday, 7 May 2017

Never say never

Being so close to the end of my build,  I keep saying 'that's the last time I'll use that tool' and almost every time,  I've had to use it again.

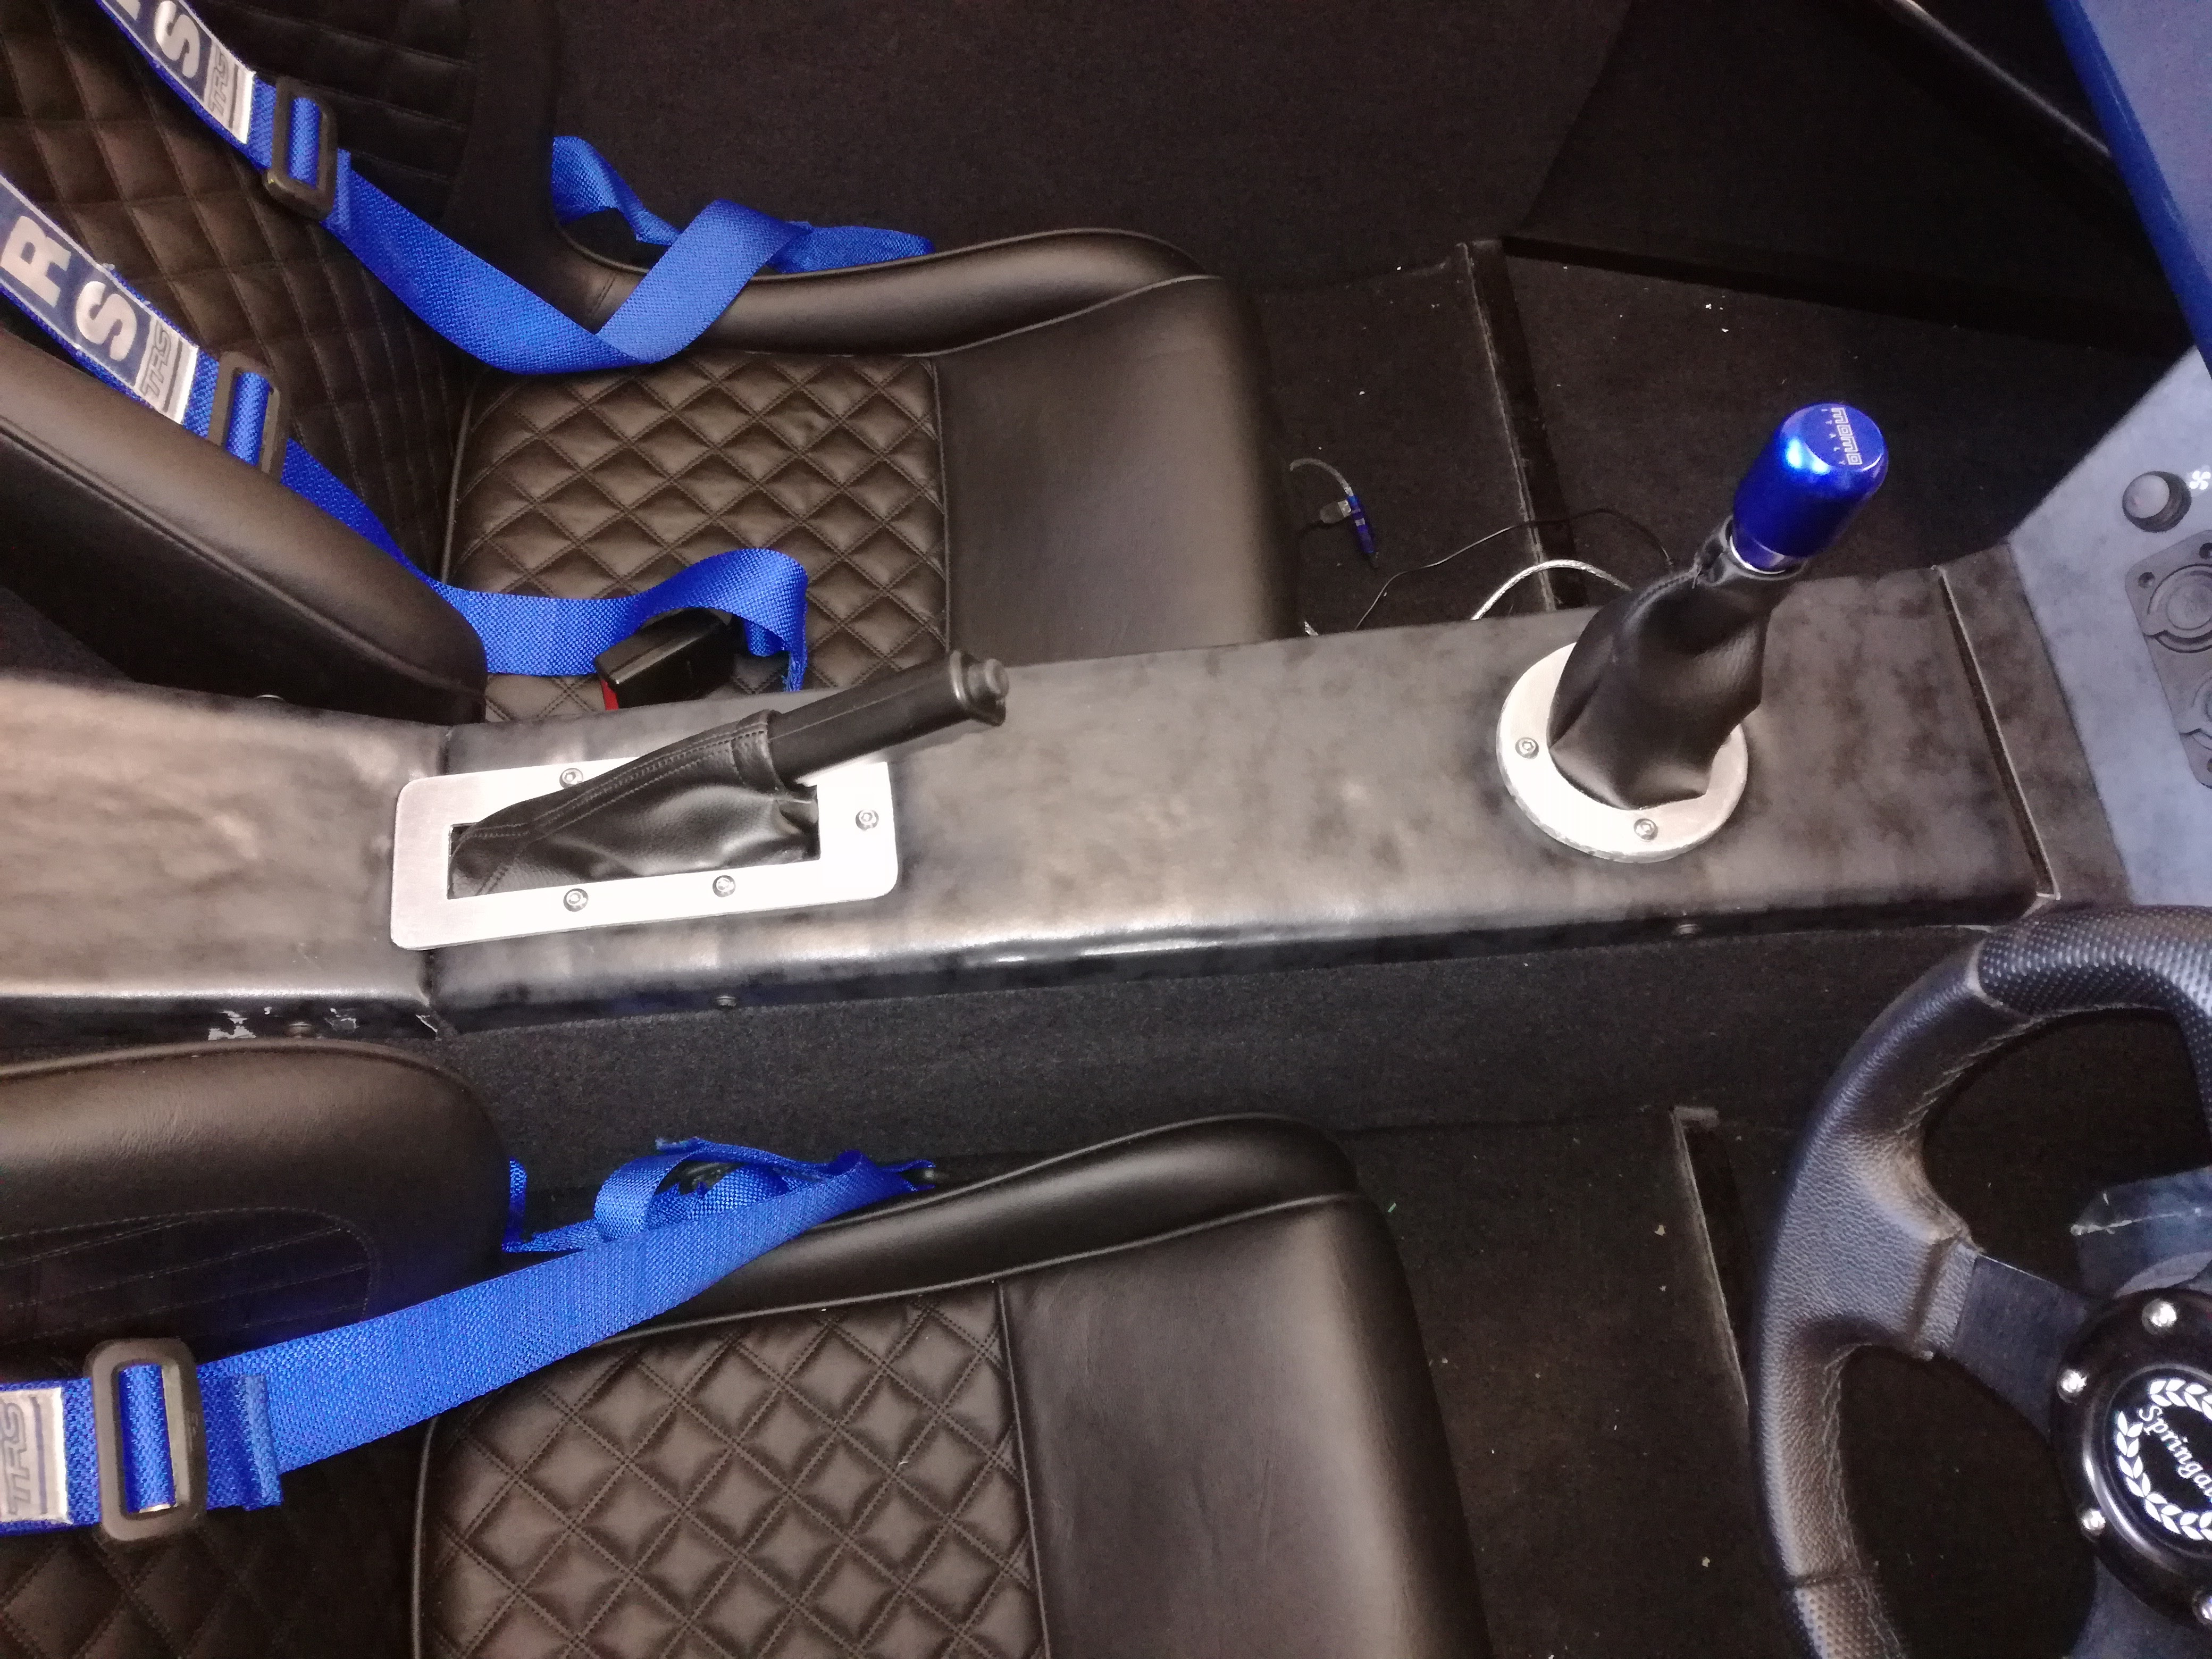
The latest was my hacksaw - I used it for my handbrake surround and put it away thinking I wouldn't be using it again but I come to fit the surround and I realise it's had to move 3mm because of the tiny little screws on the side of the handbrake switch and now it doesn't fit! So,  a couple of hours doing a new one...

Luckily, the glue on the gearstick gaiter cleaned off with white spirit and with the two surrounds and gaiters on,  from a distance,  they look ok:


I cut too much off the handbrake gaiter so it isn't held in  with anything - if I get time,  I'll buy a new one.

Worryingly, I can't connect my laptop to the ECU,  even with the new USB connector, and I've tried a second PC which also doesn't work. I'm not sure what's going on there...

I'm told the self-centering might be fixed by loosening the bolts on the U-clamp that holds the steering rack on (I do have a habit of over-tightening). I've done that and will see if it helps on my next outing.

As promised,  a better pic of my seats:


Saturday, 4 March 2017

Non-stick carpeting

Having said the front of the car was finished,  I just had to plug in the front indicators - surely a job of seconds,  I hear you say?

Two (yes,  2!) hours (yes,  hours!) of swearing later and it's done. Jesus.....

The problem is that you can't plug them in without putting the nose on first but once you've done that,  it's very difficult to get your hands down into the nose to get at the plugs,  especially on the O/S where the throttle body is in the way. In fact,  to do the O/S, I resorted to extending the wires by a foot,  so I could pull it all the way out the nose and connect it up.

The stickers arrived for the aux panel and I labelled the various switches. Also adjusted the handbrake and bent the metal switch arm so that the handbrake light came on correctly.

The rear lights are a bit trickier than I thought - I seem to have somehow got the whole assembly the wrong way round,  so I might have to take them off fully and swap them over - annoying.

I broke out the carpets and tried to do the main rear panel piece but I couldn't get the glue to flow. The tin says to use between 5 and 30 degC and it wasn't that cold in my garage,  about 10 degC,  so not sure why it didn't move. Next time,  I'll put it in front of my fan heater to warm it up.

A concern I've had for a while was the body height - from the back,  the car has not been level. Today,  I adjusted the shocks so that they're about halfway up their travel but I still have a wonky chassis height; 135mm on the O/S and 125mm on the N/S. Maybe the weight of the exhaust? I've asked the question on the GBS forum.

Update: I'm told that the height issue is not unusual and the suspension should eventually settle but will probably need some adjustment.

Sunday, 30 October 2016

The Beast Awakens

One of the best days of my build so far...

The plan today was to get the wheels on,  roll the car out,  clear out the dump that is my garage and try get the engine tuned to run better. 

Firstly,  tidied up some tunnel wiring:


I had to cut-out a small piece of the dash support piece on the side where the Carling switches are,  to enable the dash to be fitted in place:


Only 3 holes line up with the rivnuts on the dash support -  I will need to fettle the others at some later point. 

With that done,  out came the wheels for the first time and simply bolted on. The next step was getting the car down off the axle jacks, which was trickier than I expected; the rear wasn't too bad as my jack could go up enough to lift the car,  removed the rear stands and lowered the car to the floor. The front was more difficult as my jack wouldn't extend up high enough to get under the front chassis rail - I had to use an extra piece of wood and,  after removing the front stands,  then I lowered the car too quickly,  trapping the jack underneath! Luckily,  a neighbour came to the rescue with his own jack,  which I used to recover mine. 

So,  the car was on its wheels for the first time! Damn,  it's low... 

Now to get out my garage which has a 2 inch lip down... my son in the driving seat to work the brakes,  my neighbour pushing from behind and me at the front checking nothing grounded. I used a couple of wood pieces as ramps and slowly,  she rolled out to meet the world - and looked amazing:


Absolutely love those wheels!

My garage looked a state:


... but a bit of work and tidiness was restored:


The one bit of bad news was that I couldn't get my ECU to talk to my laptop - I recently had to overwrite Windows with Ubuntu (because of a virus) and it doesn't seem to recognise the USB port. Not sure how to fix that... 

I left the engine running for long enough for the fan to come on,  which is great to know that works and my thermostat seems to work as all the coolant pipes got hot (and didn't start leaking). Brake lines all still leak-free as well,  all my electrics seemed to still be working and all the gauges do something - wonderful!

Even the handbrake works well without any adjustment (although I should maybe do some to make it come on with less travel). 

Even the wife,  dad and dog got involved:


But best of all (after a weekend of great things) was DRIVING MY car!! OK,  2 metres forward and several back but IT MOVES! Like a real car! 

Spent a while having to adjust the clutch cable (and still needs fine-tuning) but all gears were easy to select and power goes to the wheels. 

Which is lucky because I had hoped to reverse the car back into the garage,  which I was able to do,  with some wheel spin,  lots of fumes and wonderful noise. 


I am a very,  very happy chappy. 

There are some issues to be addressed; the horn didn't work and the wheel alignment needs work and I may have done the rear suspension bolts up too tight all those months ago; there is no give in the rear at all,  even with my weight on it. 

But it has been a weekend of great import and I am,  as the kids say,  stoked! 

Sunday, 20 September 2015

Comedy of Errors

Well,  the 42mm socket arrived - great! It's got a 3/4" drive and my torque wrench has a 1/2" drive! Cue many swear words. Back online to order a converter - one of the things I'm finding is that the normal high Street culprits (Halfords, Screwfix etc) do not do the larger size items like this.

The converter finally arrived and on went the hub nuts. My problem now is how tight to go. It is supposed to be done up to 250nm - my torque wrench only goes to 210nm. Worse,  I can't even get to that figure because I'm tightening a nut on a driveshaft which is designed to...  er... turn. I had a metal pole through the hole in the hub and against the chassis which got it on enough that I could lift the entire chassis on the torque wrench,  before the pole started to bend!

I'm not sure how much more to try - it's difficult to believe it could work loose (it's a nyloc as well) and some on the RHOCAR forum have said they just tightened as best as they could and didn't even use a torque wrench and haven't had any problems since.

I'll think on it - the nut is always accessible to tighten later.... in fact,  thinking about it,  I could probably tighten it once the car is on the ground and the other wheel and handbrake is on?

In the meantime,  I've got the discs,  calipers,  handbrake and brake lines all connected up:


I need to ask about the copper brake lines - everyone else seems to have P-clipped them to the chassis but they seem very sturdy the way I have them and because they aren't clipped on,  they're much further away from that handbrake cable than the others. Yup,  all OK -  IVA rules state they only have to be supported every 300mm.

You may notice that I have one solid rear brake disc whereas most people have twin ventilated discs. I bought mine before I realised I had the choice but there has been an unforeseen advantage -  there is much more space in the caliper for the disc,  with a good 2-3mm each side. This has meant it has been much easier to file the caliper carrier ends down (they're a couple of mm too long,  even after the powder coat is off). That one disc was enough to stop a 1600kg Sierra so I'm sure I won't be under-braked. And they were cheaper.

I've also filled the diff with oil,  properly attached the breather tube and fitted the rear stability bolt,  which was a bit tricky.

After the 93rd time of hitting my head on the roll bar supports,  I fashioned some protection for my head :-)


Friday, 28 August 2015

Lines of thought

I was getting a bit panicky about how many jobs there were that I'd  started but couldn't finish - handbrake,  pedals,  master cylinder etc. 

But after some thought,  this is the plan of attack:

1. Fit driveshafts (now painted but need new boots fitting). 
2. Fit rear hubs. 
3. Rear brake discs and calipers. 
4. Fit handbrake cable to caliper. 
4. Brake lines from 4-way unit above diff to calipers (copper to braided). 
5. Brake line from master cylinder to 4-way unit. 

Started by fitting a rivnut for the 4-way unit:


More difficult than it sounds - the hole is too big really and I destroyed 4 rivnuts before cunning use of a soldering iron got the job done. 


As I plan to start on brake line routing,  I thought I'd better check where the steering column goes:


Raised a few concerns about proximity of brake pedal to column and if I've done the 'grommet from Hell' properly. 

Wednesday, 26 August 2015

Mix 'n match

I've been keeping my eye open for a brake fluid reservoir as they're supposed to be hard to find and that was proving to be true.  None on eBay (yes,  it's possible) and no luck on those various sites supposedly linked to breakers yards round the country.  There's one listed on the GBS website but whenever I've looked before,  it's always said 'out of stock'. But suddenly,  while aimlessly looking at other stuff,  it came up as 'in stock'! I've never rushed through a payment process so quick! Arrived yesterday:


UPDATE: I thought this was the standard Sierra reservoir that fits on top of the master cylinder but no,  it's the reservoir that goes with the remote kit that GBS sell - doh! The Sierra ones are almost impossible to get now -  Ford have stopped making them.

Bits and pieces tonight - got the old boots off the driveshaft,  cleaned them up with a wire brush and brake cleaner and put a coat of Hammerite on the main shift. I'll also do the ends another day.

Got the correct bolts for the master brake cylinder and loosely installed them. Loosely because I seem to have a habit of needing to unscrew everything.

Attached the handbrake and cables (loosely ☺) :


Finally tonight,  some practice with brake pipe flaring. First attempts a bit iffy (on the left) but sorted by the 3rd attempt (on the right) :


Update: OK,  major problem here. The flares I did here are single flares and they are NOT right for brake lines. They need to be double flares.