Wednesday, 11 May 2022
Let's get Radical

Friday, 15 April 2022
The power of tough love
It's like Zedster read my last entry and decided to buck up his ideas - a brief run out today in glorious sunshine and my voltmeter was back up to 13.8v, no idea why.
Also, on my return, I found the source of the coolant leak; a knackered jubilee clip that holds the pipe on one side of the adaptor that my non-functioning temp sensor sits in. Is the leak the cause of the sensor not working properly? Ordered a new clip and we'll see how that goes...
I've finally booked a rolling road session with John Lamsley, the guy who used to work for Emerald. I don't really want to do a RR session because I've read of too many people who's cars didn't survive the experience unscathed but I need the cold idle fixed and the hesitancy at high revs. I'll let you know how it goes...
Finally today, I mentioned that Zedster feels faster since the new throttle pedal? Well, I found a straight bit of road and made use of my speedos built-in 0-60 timer. Last time I did this, I managed 7.2s on a slightly damp road. Today, a much more respectable 6.2s which makes me feel better (sad, I know but speed is GOOD). For reference, my sons I30N does it in 4.9s!
So, Zedster life is a bit rosier...
Monday, 4 April 2022
Hotting up
Missed me, fans? Sorry, been out on a few runs but nothing exciting enough to tell you about...
What I have done is hopefully fixed my temp gauge - it's not been working for a while and it seemed to be the sensor because when I took the old one out and tested it with a multimeter, the readings were all over the place. So I ordered a generic one which looked physically similar but that didn't work either. It showed 1900 ohms at room temperature and 300 ohms at 90 degC, which i assumed was OK - obviously not.
I finally got round to buying a proper Smiths sensor and it ranges from 520 ohms down to 90, which, after searching online, is the correct range for the Smiths temp gauge.
Not tested yet but I'm sure it will work...
More to worry about - I seem to be losing coolant a bit more than normal. I've always lost a little from the top of the thermostat because I drilled a hole in it for the main temp sensor but I seem to be losing more now and, worryingly, there is a little pool of coolant along the bottom of the radiator. I may have a leak there... I'll keep an eye on it.
Six weeks until a week-long trip to Derbyshire with the SKCC Rogues - really looking forward to it.
Saturday, 17 June 2017
Mixed bag
First impressions of my car? It's very low! Everything else on the road towers over you. A truck pulled up behind me at the lights and I was in its shade! It gets thrown off line by any reasonable size bump or hole in the road so you have to constantly adjust the steering. I think a session with a suspension expert post-IVA will be needed.
The steering is surprisingly light on the move and the brakes are improving all the time and the exhaust note sounds very promising for when I can give it some beans.
A problem however; my speedo is over-reading by a lot - OK up to 30mph but by about 45, it is showing 70, which is outside the tolerance allowed by IVA. Bugger...
Amazingly, the whole emissions test went swimmingly. Initially, my CO figure was showing about 7 at idle, when it needed to be below 0.3! And the HC value was 600 and needed to be below 200!
But removing fuel (lowering injection values) and retarding the ignition soon reduced them down to below the required levels.
At fast idle (2500 rpm), it was already quite good but a slight adjustment of the ignition map at the 3000 rpm site seemed to bring it right down to the required values.
I'm a bit worried that this was too easy - we'll see on Monday, I guess.
The coolant leak is from the pipe at the bottom of the radiator and even with the car up on the ramp, I couldn't get to it to tighten it. I'll have to take the nose off tomorrow to get access.
Also got the headlights adjusted so I just need to add some covering over the nut and bolt.
Thursday, 15 June 2017
Hotting up
4 days to IVA...
Sunday, 27 November 2016
Road trip #1
Today was engine tuning day, as it wasn't raining and the rest of the family was busy. Car rolled out the garage (new ramps did the job), laptop connected up and away I went. I'd got some instructions from Simon (ex of GBS - he recently left but is still thankfully answering questions on the forum, which is very good of him).
As with a lot of my work, I'm not sure if I've done this right. I've had the engine running fine before using what I thought was the Power Map (as Simon called it) but when I loaded it up today and recalibrated the TPS, I couldn't get the engine to idle at all - it wouldn't run without a lot of throttle and even then, it popped away like mad. Very confusing.
So I loaded up the base Zetec map that came with the ECU and that idled fine, thankfully. I tried following the instructions, adjusting the mixture to get the most stable idle, fiddling with the idle screw on the throttle until I think I got something decent; idles reasonably smoothly at around 950rpm.
I decided that reversing back into the garage is too tricky, especially without mirrors so I decided to drive in forward, which meant... a road trip!
OK, the world's slowest and shortest Road trip but that's MY car, that I built myself!
I did have a slight coolant leak but a quick tweak on the offending jubilee clip and seemed to be OK. I've also made a start on the rear wheel arches...
Sunday, 30 October 2016
The Beast Awakens
Even the handbrake works well without any adjustment (although I should maybe do some to make it come on with less travel).
Wednesday, 29 June 2016
Apocalypse in progress
Finally dragged myself out of the doldrums to do some odds and ends. Just to add to my woes, a small, pink puddle of coolant had appeared under the car. Turned out to be a Jubilee clip that had given up on life, I think because I over-tightened it at some point. Replaced it, making sure I didn't go nuts when tightening.
Fitted the horn and front chassis earth:
I added several support structures for the coolant pipes which basically consist of jubilee clip brackets and cable ties. May sound basic but the pipes all feel nice and secure now.
Somehow, I ordered one warning light wrong and I didn't notice when fitting it - Doh! So waiting for that to arrive... also, the speedo I ordered months ago is missing it's wires. GBS are trying to get that for me from the original supplier. These 2 issues are preventing me finishing the dash wiring - I've done most of it.
Sunday, 15 May 2016
Baptism
Gingerly poured in all 5 litres - immediate leak at the bottom of the header tank because I had forgotten to tighten the clip there - Doh! Small leak further down - clip tightened and it stopped. Added a couple more litres of water (run out of pre-mixed stuff) and looks OK so far. I won't have any water in the pipe from the top of the radiator to the thermostat - that will have to wait until the engine is started and I get some heat into it to open the stat - but the theory is looking OK as no other leaks at present. Will check it tomorrow...
I also drilled the holes in the dash for the 2 main dials. I took a risk and used the 76mm hole saw to make the required 80mm hole - fortunately it worked well and it just needed a small amount of sanding to get the dials in.
I started on the holes for the warning lights but these need to be 14mm wide and my largest drill bit is 10mm. I couldn't think of a safe way of extending the holes (I don't have any sanding drum that small) so I've ordered a conical drill bit to do the job with. I also used a scrap bit of fibreglass to practice doing a square hole for the rocker switches I'm going to need for lights, hazards etc. Took quite a while on do one and it wasn't very neat - need to have a think about a better way of doing them (I need 5).
My plan was also to put those down the right-hand edge of the dash but there isn't a lot of space there - I'll need to trim pieces out of the metal back plate that the dash rests on. Need to think about whether to continue down this route or try putting them elsewhere...
Also bought and fitted the battery, which is fairly major - hints at Frankensteins monster coming to life soon?
Wednesday, 27 April 2016
Boxed in
I really want to try fill the coolant system and check for leaks before I go much further but to do that, I really need the firewall in place and that really needed the pedal box fixed. I realised that I've gone to some effort, like others, to use rivnuts for the firewall to make it easily removable in the future BUT unlike others, I've got a header tank and a brake fluid reservoir bolted to the firewall, so removing the firewall in future, even with rivnuts, isn't going to be that simple. Ah well...
Spent a while staring at the pedal box, trying to work out if I could safely rivet it in place. Pedals done, clutch and accelerator cables in place, brake lines in place - couldn't think of a reason not to, so out came the gunk and rivets.
After that, I went a bit nuts and bolted the firewall down and fitted the pipes for the brake fluid as well as a few small jobs - bent the clutch cable bracket a little to give a better angle, grommet in the firewall for the brake fluid level wire and fitted the final pipe in the cooling system, from the top of the thermostat to the top of the header tank.
All looking pretty good:
Good evening all round - always nice to finally tighten something.
Monday, 18 April 2016
Great news! A screw-up...
Art and hacksaw skills to the fore:

... And then some panel-beating/bending:
Attached to the header tank:
And then riveted to the firewall:
... along with the remote brake fluid reservoir. I've riveted and bonded the battery tray in place so the whole lot looks like this:
The wiper motor should be delivered tomorrow and that goes on the other side of the firewall and will determine the battery position (more precisely, where the battery cables can come through the firewall).
I also, scarily, started work on my fibreglass dash. Having never touched fibreglass in my life before, I decided to do the small holes on the edge that will match up with the rivnuts in the scuttle inner panel. Trickier than I expected - eventually used a ratchet strap to hold the scuttle in place, put the dash on and drilled pilot holes through the rivnuts from the rear. I then took off the dash and did the holes with a 6mm drill. The best result was when drilling at a slow speed and the holes are pretty neat but whether they're right is yet to be seen.
Started thinking about the wiring loom for the instruments - I'm doing my own instrument loom as well. The plugs on the GBS main loom are something specialised which I can't find on the Internet to buy (!) and GBS don't have them to sell (they don't make the looms in house). So, I'm going to chop them off and use standard plugs, which are on order.
PS: a minor milestone; this is my 100th post!! As I tend to post after every garage session and my sessions average 2 hours, this gives a rough idea of how many hours my build has and will take. Allowing for the fact the first 20 or so posts were pre-build, I've roughly spent 160 hours on my build so far.
Tuesday, 12 April 2016
28
Nope... the number of jubilee clips I've used on my cooling system! That's 28 possible leakage points... I may live to regret this 'cost-saving' process.
Anyway, depending on your outlook, it is almost a work of art or an utter pigs ear of a job - you decide:


If it works, it's genius... the eagle-eyed may spot one missing clip (JNIT) and I haven't done the header tank yet.
Ah, just remembered I've forgotten the last small pipe from the top of the thermostat to the top of the header tank, so that will be 2 more clips!
For reference, this is the setup I have, with the exception of the small green pipe from the top of the radiator :
Sunday, 10 April 2016
The pipes are a calling
Desperate to get my fix of garage time, I did some odds and ends; completed the TPS plug:
... and the coolant sensors:
I'll probably tidy up those wires later on.
I realised there were a couple of pipes that could be tidied up - I've trimmed the silicon on the cold bypass that will be underneath the hot exhaust manifold, so that only the ally pipe will be directly underneath, just in case there is an issue with melting silicone.
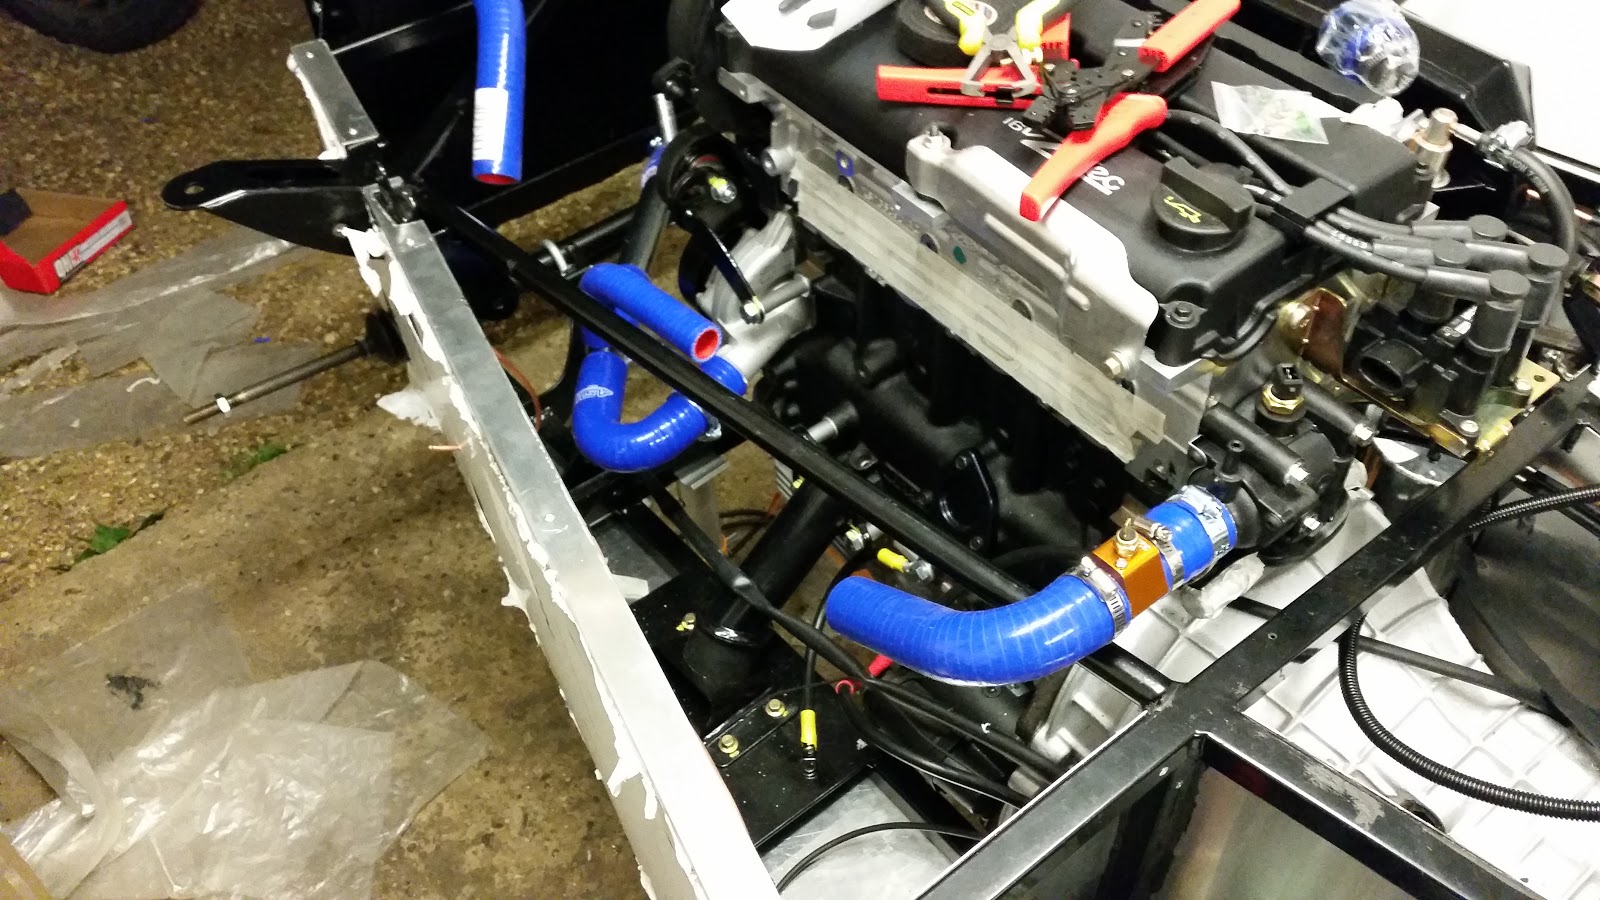
I put the firewall loosely in place to locate the header tank and realised I could finish off the pipe from there to the lower T-joint (sorry, forget to get any pics - next time). Only thing missing are the 6 jubilee clips I need - need to buy them. Hopefully I can get them from Homebase and not rely on a delivery...
Scarily, I'm not too far from an attempt at an engine start.... assuming I can do that without gauges wired up?
Monday, 4 April 2016
CAT scan
Results were purrrfect :-). Sorry...
With the answers from GBS on the coil pack wiring, I finished the plug and connected it up. Also got an answer from Emerald for the coolant sensor and did that as well.
Got some more pipes for the cooling system but still a couple outstanding. I might break a record for the number of Jubilee clips in one engine bay, at this rate.
Once those other bits arrive, I need to put the firewall in place so I can work out where the header tank has to go.
Saturday, 26 March 2016
Pipemania
As is often the case, I've been halted by a lack of parts - I need a few more pipe bits which are on order. I'm going to end up with quite a mass of pipes under the exhaust manifold and a heck of a lot of jubilee clips to get all the angles. It's actually quite fun trying to route it all but it's not going to look as simple as the GBS water rail - I can live with that.
I forgot to say that I've fitted the radiator and fan (6 months ago, that would have been a momentous task for me, now I almost forgot to mention it). Previous blogs seemed to talk about having to bend brackets but maybe GBS have changed the chassis because it was pretty straightforward for me:
I also fitted the dipstick, in case it affected the route of the piping (it doesn't).
As I've got the thermostat and the other temp sensor in place, I started finalising that end of the engine loom. Got stuck with working out which pins are which on the coil pack (and the TPS) - put a post up on the GBS forum to ask.
While I'm summing up, did I mention that the dashboard had a small crack in it when it arrived in the post? Thankfully, GBS will replace it so this one goes back in the post next week.
On holiday next week, so no more updates until then...
Wednesday, 23 March 2016
Blue worms
First off, loosely attach the thermostat to the engine and the special adaptor piece for the second temp sensor to fit into (this one is for the dash gauge and so location isn't as critical as the other one, which is for the ECU). Apologies for the colour of this adaptor - the picture on the website was in blue but the colours were size dependent and, obviously, I didn't notice that:
Several weeks ago, I drew up a plan for how the cooling system pipes fit - hopefully, this is correct:
Obviously, not finished - I need:
1. Main 32mm pipe to go in from thermostat to top radiator pipe (I may need to buy another bit of silicon for that).
2. 22mm pipe from lower thermostat pipe to the T-junction before the water pump (cold bypass?).
3. 22mm pipe from bottom of header tank to T-junction near bottom radiator pipe.
4. Small (8mm?) pipe from top of thermostat to top of header tank.
I would post a scanned image of my cooling system design but it's not pretty and unlikely to be helpful to anyone else.
Monday, 21 March 2016
Just like the Pointer Sisters...
And I just can't hide.... OK, enough of that, sorry...
The 'last chance saloon' tap arrived to try get the coolant sensor adaptor in the Ford thermostat and it only went and worked!
This is a thread:
And this is the often-mentioned sensor in place:
Hopefully, I can crack on with the coolant system now and if this all works, it will have saved me £200 or so.